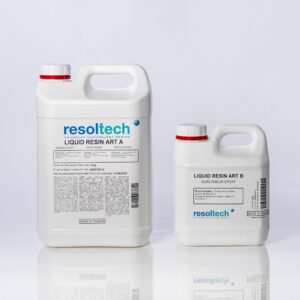
Free delivery in Benelux until 10kg.
€ 24,01 – € 151,81 HTVA
Mixing can be done by volume, so you don’t need a scale to work with it.
The ratio is 1:1 and its low viscosity makes for easy, homogeneous mixing. After 30 seconds, the mixture begins to foam and quickly hardens into a solid, flexible foam.
The expansion of polyurethane foam depends on its density. The lower the index, the more the foam expands. The density of the foam is used to calculate the volume required for filling.
Thanks to a wide choice of densities, soft PU foams are ideal for the manufacture of fighting tools (swords, knives, hammers, etc.), industrial gaskets, custom upholstery, but are also used as repair materials for seats, for the design of custom transport boxes, fake cinema accessories, bodies, food, or any other incredibly realistic objects.
Polyurethane products and polyurethane foams can be pigmented in the mass with the 9 colorants in the SO-Strong™ range.
Mixing ratio by volume: 1:1, mixing ratio by weight 105A : 100 B
Density: 80 kg/m³.
Expansion: X11
Color: whitish
Working time: 50 sec.
Demoulding: 45 min.
Complete polymerization: 2 hours
1 – Preparation
Surface: Make sure the surfaces to be treated are clean, dry and free from dust, grease and oils.
Temperature: Apply foam in a low-humidity environment at an ambient temperature of 23°C.
Protection: Protect surrounding areas with tape and tarpaulins to prevent accidental spillage.
The mixing container should have straight sides and a flat bottom. Mixing sticks should be flat and rigid with defined edges, so that you can scrape the sides and bottom of your mixing container.
2- Release agent
Polyurethane foam has a strong adhesion to many surfaces (wood, concrete, stone, plaster, etc.), so it’s necessary to use a release agent.
WARNING: Do not use silicone release agents. This will cause the foam to collapse
3 – Mixing ratio
Mixing ratio by volume: 1:1
Mixing ratio by weight: 105A : 100 B
4 – Quantity
Use our calculator at the bottom of the page to find out how much foam you need.
5 – Pre-mixing and mixing
Shake Part A and Part B bottles vigorously before opening and dispensing.
After calculating and weighing the quantity of foam required to fill your mold, pour component B into component A.
Mix quickly and deliberately for at least 15 seconds. Be sure to scrape down the sides and bottom of your mixing container several times.
Remember that these materials expand and harden rapidly. Don’t delay pouring into the mold.
6 – Filling the mould
For best results, pour your mixture into a single point at the lowest point of the containment field and allow it to level out.
Leave space in the containment field for the foam to expand as it reaches its final volume.
7 – Hardening
Allow foam to harden for at least 30 minutes before handling.
Completely dry after 2 hours.
8 – Board
Large volume: Casting large quantities at a time in certain mold configurations (e.g. cylindrical) can lead to excess heat and cracking. Casting in successive layers can solve this problem.
Pigmentation: Add the colorant to component A, mix vigorously, then insert component B into the container mixture.
Is your foam sagging? This is a common phenomenon associated with cold or inadequate mixing.
9 – Storage
This type of product has a limited shelf life and should be used as soon as possible.
10- Security
harmful by inhalation. harmful by inhalation Good ventilation is essential.
Wear safety goggles, long sleeves and gloves to minimize contamination.
Contact with skin and eyes may cause severe irritation.
Part B (blue label) is irritating to eyes and skin. Avoid prolonged or repeated skin contact.
Part A (yellow label) contains methylenediphenyldiisocante. Vapors, which may be significant if heated or sprayed, may cause lung damage and sensitization. Use only with adequate ventilation.
To calculate the quantities and proportions of product you’ll need, specify the product in question and the dimensions of the area to be filled.


RUE J. VAN HOVE, 35 1950 KRAAINEM
Mo-Fr 8:30 - 12:00 / 13:00 - 17:00